
The procedure is standard for most Office applications.
Protect a Word Document
First, open first (and easiest option) is to simply try to encrypt the email you are sending with Office 365 built-in encryption. This works on some emails and documents but not all of them depending on the format and complexity of the PII. To do this use the following steps-
From the Outlook desktop client:
With the message you are attempting to send opened in a full window (not preview), click Options, Encrypt, and then Encrypt-Only before sending the message.

From Outlook Web Access:
Log in to https://outlook.com/frostburg.edu with your FSU email account, and then click on the new message or reply to message button. Right next to Attach, there is an Encrypt link, click on it before sending the message.

If the emails are still being blocked from sending, the next option is to create a Microsoft Office document that contains the information. You will then encrypt the file with a password and send that password to the recipient separately. Here are instructions for doing that-
For Microsoft Word or Excel Documents:
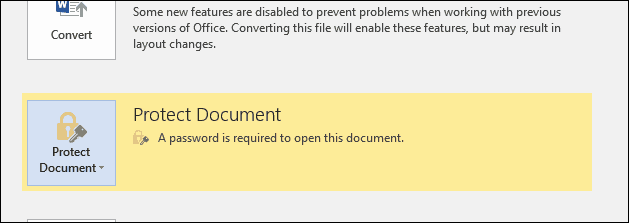
First, open or create the Office document you would like to protect. Click the File menu, select the Info tab, then select the Protect Document button. Click Encrypt with Password.
...

Enter your password then click OK.


Enter the password again to confirm it and click OK.
...

Microsoft Word will now indicate the document is protected. Each time you open the document, you will be prompted to enter your password to access its contents.
Protect all or part of an Excel workbook
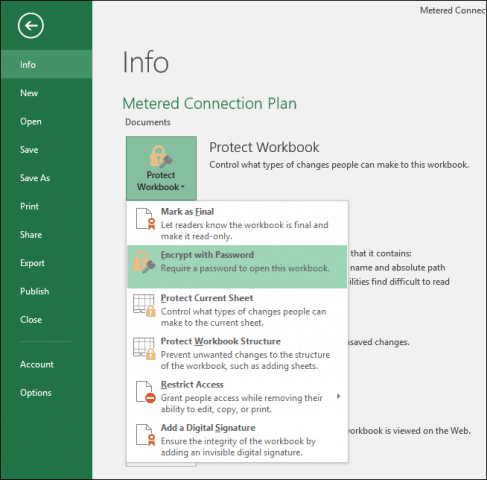
For Microsoft Excel Workbooks, you can protect all or parts of a workbook. To do that, use the following instructions. Click File, select the Info tab, click the Protect Workbook button. Click Encrypt with Password then follow the same instructions used when protecting a Word document.
Protect a sheet
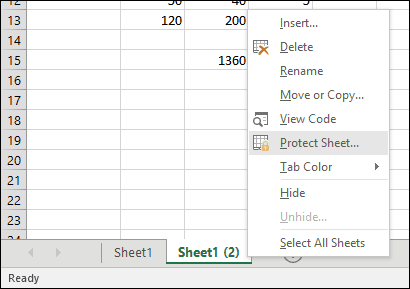
If you have a shared workbook, you can protect a particular sheet without locking the entire workbook. Right click the sheet then click Protect Sheet.
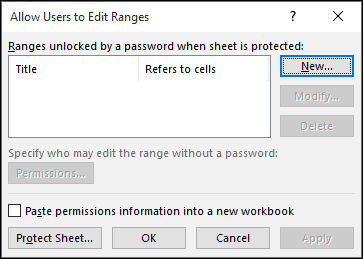
If there is part of a sheet you would like to protect from modification, you can do so too. First, highlight the range then click the Review tab. Click Allow Users to Edit Ranges
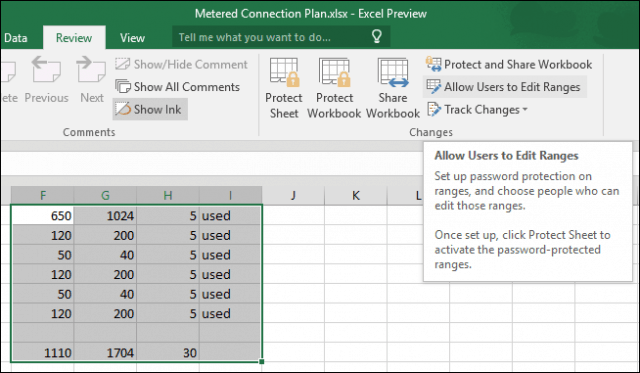
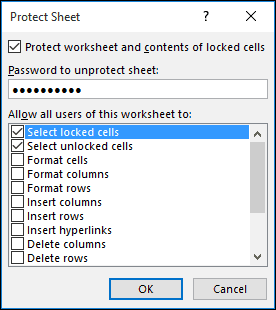
Click Protect Sheet.
Enter a password then confirm it.
When you try to make changes to that range, you will receive the following message:
...
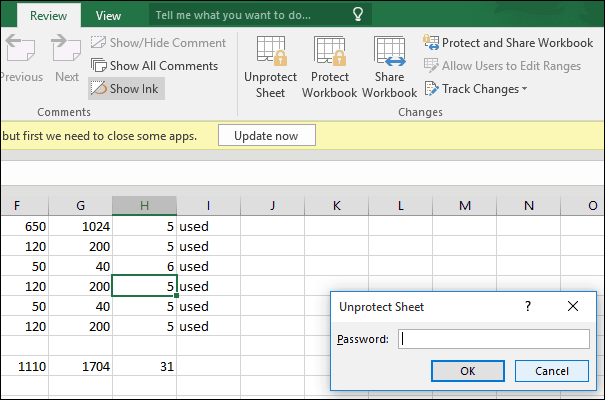
To make changes to the range or a particular cell, select it, go to the Review tab then click Unprotect. Enter your password then click OK
Password protecting other types of Microsoft Office files
When working with other types of Microsoft Office files such as a Microsoft Access database, there are some minor requirements. Access 2016 requires opening the database exclusively first before you can password protect it. To do so, click File > Open, select your Database file then click the arrow beside the Open button then click Open Exclusive.

Enter and confirm your password then click OK.
...
